
Columbia Men's Silver Ridge Utility Pants
A replacement option with documented gusset and pocket construction to compare with the cause of your old pair’s wear.
Consider: Documented features are not a guarantee against future damage.
Check on Amazoncare
A tiny slit in the lower leg and a thinning seat are both damage, but they are not the same repair job. The slit may have sound fabric around it; the seat may offer little support for a patch. Before reaching for thread or adhesive, inspect the shape, location and surrounding material. A repair succeeds when it suits the problem and the way that part of the pants moves.
Three places to start
As an Amazon Associate I earn from qualifying purchases. Purchases take place on Amazon.
A replacement option with documented gusset and pocket construction to compare with the cause of your old pair’s wear.
Consider: Documented features are not a guarantee against future damage.
Check on Amazon
A lower-cost candidate if repair is impractical and straightforward utility features fit your routine.
Consider: Inspect the fit that may have contributed to the previous failure.
Check on Amazon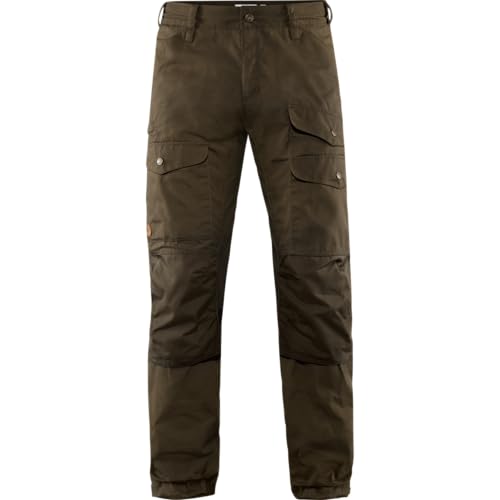
A higher-priced construction to investigate when repeated rough contact is a genuine part of use.
Consider: Not tearproof; exact material panels and care still need checking.
Check on AmazonEditorial selections from the products considered for this guide; not hands-on test awards. Budget and premium describe positioning, not a guaranteed current price.
Lay the clean, dry garment flat in good light. Look at both sides of the affected area, including the seam allowance where accessible. Notice whether the fabric around the opening looks intact, fuzzy, thin or distorted. A repair depends on more than closing the visible gap.
Check nearby stitching and pocket corners. A small opening at a stressed seam may be part of a longer area of wear. If several nearby points are failing, repairing only the most obvious hole can leave the underlying problem unresolved.
Take photographs before changing the damage. Include a wider image showing its location and a close view with a simple size reference. These can help a manufacturer or alteration professional assess the job and preserve a useful record if you later compare the repaired area.
A clean tear through otherwise sound fabric is different from an opened seam where the fabric edges remain intact. The first needs a way to bridge damaged material; the second may need appropriate restitching. Neither automatically calls for the same adhesive patch.
Abrasion can gradually thin a broad area before a hole appears. A small patch over the first opening may attach to equally weakened fabric beside it. This is where the condition of the surrounding panel matters more than the neatness of a patch shape.
Hardware damage is another category. A lost button, stuck zipper or failed adjuster may require a replacement component or professional attention. Do not force a closure repeatedly simply because the rest of the trouser is in good condition. Diagnose whether fabric or debris is obstructing it before treating it as a broken mechanism.
Identify the fabric and any coating or finish using the exact model and care information. An adhesive intended for one textile may not suit another surface. Wax, contamination and stretch can affect whether a proposed method is appropriate, so read the repair product's compatibility instructions rather than choosing by appearance.
Movement matters too. A repair across a knee or seat experiences bending and tension that a patch near a quiet lower-leg area may not. A rigid repair on a stretchy panel can concentrate stress around its edge or change how the garment feels. The solution needs to accommodate the panel's role.
Mixed-material trousers require panel-specific thinking. Instructions for a reinforced section do not necessarily apply to adjacent stretch fabric. Fjällräven's care guidance, for example, distinguishes G-1000 material from other panels for waxing; that broader lesson of identifying the actual panel is useful before any repair decision.
If a compatible adhesive patch is appropriate, follow its preparation, sizing, application and curing guidance exactly. Do not invent a universal overlap dimension or curing time: repair products and surfaces differ. A patch chosen for waterproof outerwear may have a different process from one intended for an ordinary woven fabric.
Preparation should be compatible with the garment as well as the patch. Avoid using a strong solvent simply because it appears in unrelated advice. If cleaning requirements conflict with the garment's care restrictions, choose another method or obtain guidance.
After application, allow the stated process to finish before washing, packing or stressing the area. Check the edges and the movement of the panel. This is a practical inspection, not certification that the garment has recovered its original performance. A repaired rain garment may need manufacturer assessment of waterproof construction.
An ordinary opened seam or a suitable woven panel may be a sewing job for someone with the right skills and equipment. The choice of stitch, thread, reinforcement and access depends on the exact construction. A generic instruction to sew straight across every tear can create puckering or a new tension point.
If you are unsure, show the garment to an alteration or repair professional before making the opening larger. Explain whether you kneel, sit or carry objects against the area. Those details help the repairer choose a method that fits the garment's use rather than simply closing it cosmetically.
Do not assume conventional stitching is harmless on waterproof construction. Needle holes and specialized seam treatments matter there. This guide concerns ordinary clothing repair decisions; it does not promise restoration of a membrane, sealed seam or any protective certification.
A torn pocket bag can leave the outer trouser looking intact while small items escape inside the garment. Inspect the entire pocket, including the closure and attachment points, before deciding where the fault lies. Emptying it and turning it out where possible makes the problem easier to see.
A repair that narrows the pocket may change whether your phone fits or whether a zipper can close. Discuss the usable space, not merely the hole. If the same heavy object repeatedly strains a corner, move it or reduce the load after repair rather than expecting stronger stitching to solve every carrying problem.
Check the result while seated and with your pack. A bulky repair can create a pressure point at the thigh or beneath a hipbelt. Comfort and access are part of whether the repair is useful, even when the stitching is secure.
Some manufacturers provide care and repair routes. Patagonia's repair portal is one example of a place to begin checking options. The existence of a service does not establish eligibility, a free repair, a particular turnaround time or coverage for every purchase.
Contact the relevant manufacturer for your actual brand and model. Supply photographs, garment identity, the damage location and any treatment already applied. If an adhesive or wax has been added, disclose it; that information may affect what repair work is possible.
Get the expected scope and cost before deciding. A quoted repair that preserves a well-fitting favorite may make sense. A complex job on a broadly worn garment may not. Avoid assigning a hypothetical repair price just to make replacement seem cheaper or more responsible.
Some failures are accidental contact. Others repeat because the trouser is too restrictive, a pocket is overloaded or a hem drags. A repair can address the immediate opening while leaving the cause untouched. Review the fit and routine before returning the pair to regular use.
Use the fitting check for strain at the seat or thighs. Review pocket placement and loading for repeated storage damage. For a dragging hem, alteration feasibility may be more helpful than patching the cuff repeatedly.
Do not turn one accident into a claim that a whole model family is defective. Equally, do not ignore repeated damage simply because the pants were expensive. The useful outcome is a specific change that reduces recurrence where possible.
A successful repair may return ordinary trousers to their previous routine, or leave them better suited to short local walks and chores. Evaluate comfort, flexibility and the condition of the rest of the garment. A visible patch alone is not a reason to retire a pair that remains useful.
Replacement becomes more reasonable when widespread thinning, repeated structural failures or an impractical repair prevents the pants from serving their role. If you shop again, prioritize the problem you identified: a better fit, different pocket layout or construction suited to your repeated contact points.
The examples here span budget utility pants, a documented Columbia option and a more substantial Fjällräven design. They are not substitutes for a repair assessment. No new garment should be described as tearproof, and paying more cannot eliminate every future snag or wear point.
Tell a repairer what you need the finished garment to do. “I want the phone pocket to retain its usable opening” is more informative than “make it strong.” Explain whether a waistband repair will sit under a backpack belt or whether a knee patch must bend frequently. Ask whether the proposed work changes the fit, care instructions or appearance, and whether the surrounding fabric is sound enough to justify it. Agree on those details before authorizing the repair, particularly when the trouser has mixed panels or a complicated closure. A clear request helps distinguish a cosmetic closure from a functional repair suited to your use.
Assess the wider worn area first. A patch may have little sound material to attach to, and a larger panel repair or retirement from demanding use may be more appropriate.
Not automatically. Waterproof construction can involve membranes and specialized seam treatments. Consult the manufacturer or a suitable repair service rather than assuming ordinary stitching restores it.
Yes, if the repair is appropriate and the garment remains comfortable and functional for the intended outing. Appearance alone does not determine usefulness; check the repair and surrounding fabric regularly.
Start with the damage category and the soundness of the surrounding fabric. Then choose a compatible patch, sewing repair or professional assessment that respects how the panel moves. Investigate repeated strain so that the repair does not face the same avoidable problem immediately. Keep a useful repaired pair in service when it still meets your needs, and replace it when the remaining construction or repair practicality no longer supports its role. Repair is a decision about function, not merely covering a mark.